Guide
Claiming Land
From Dogcraft Wiki
In order to protect your new piece of land you have found on the Dogcraft.net server, you will want to claim some land to mark it as your own and prevent unwanted visitors from building and taking stuff from it. In this Guide to Claiming Land, everything from basic claiming to advanced subdivisions to become a mayor will be covered.
What is a Claim?
In essence, a "claim" is a square region of land that is marked in your name on the server, which, by default, other players cannot build, break or pillage within. Dogcraft uses a plugin called GriefPrevention to do this. Claims have some other properties, too. Creeper and Wither explosions, Endermen block moving and TNT will not work by default within claims and even fluids such as water and lava cannot flow from outside to inside a claim.
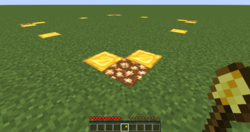
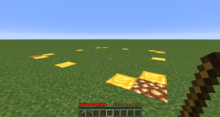
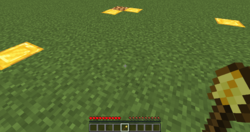
Claims work on a system of "Claim Blocks", of which you earn 100 of every hour and can purchase more from the Dogcraft.net store. Each square block in a claim you make uses one of your claim blocks. This means that claims can only be of finite size. In-game, claims are visualized by temporary markings of gold and glowstone that are only temporary and cannot be mined.
Creating Claims
There are three methods of creating a claim.
Chests
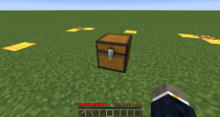
When you first place down a Chest on the Dogcraft.net server, a 10x10 claim will be automatically setup around it protecting the area. Note that this only works the first time, and the chest cannot be within an existing claim.
Golden Shovel
You can create a claim with a Golden Shovel tool. These are sold in a Shop Chest at Spawn for 1 Dogcraft Dollar.
Command
You can use the /claim command to make a claim. Simply type /claim <size of claim> to create a claim. The size you input will be the number of blocks from you to the new border of the claim.
Trusting People
By default, nobody will be able to build or do anything on your claim. If you want to add someone to a claim, however, there's a set of tools you can use to do so giving various levels of access.
- Access Trust - Lets the player interact with buttons, levers and doors and set a home with /sethome, but not access containers and chests. Command: /accesstrust <player>
- Container Trust - Lets the player use chests and containers, from hoppers and droppers to skulkers and furnaces, as well all permissions from access trust. Command: /containertrust <player>
- Build Trust - Lets the player place and break things inside the claim, as well as all permissions from container and access trust. Command: /trust <player>
- Permission Trust - Lets the player trust other players to the claim. However, this is separate from other trust levels. Players with permission trust can only trust other players to their level of trust (e.g: If a player has container trust and permission trust, then the player is able to give other players container trust but not build Trust). Players with permission trust are not able to give other players permission trust. Command: /permissiontrust <player>
On the flip-side, you can remove a player from the trust list using the /untrust <player> command.
Another handy command is /trustlist, which lets players with permission trust and the claim owner view a list of everyone with permissions on a claim.
Finally, the claim owner can add the public to the different permission levels. Replace the <player> on any of the trust commands with the word "public" to do so. Of course, you can also use /untrust public to remove the public from the different trust levels. Note that the public cannot have permission trust.
Configuring Claims
Abandoning Claims
You can do /unclaim or /abandonclaim while standing in a claim to remove it. You will then be given back the claim blocks to use with other claims. In addition, you can use /abandonallclaims to abandon all of your claims and regain all of your claim blocks back for use.
Viewing Claims
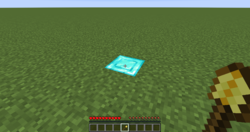
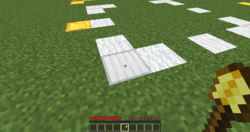
While holding a stick in your hand, you can right click within a claim to view the claim borders marked in temporary Gold Blocks and Glowstone. Any subclaims within the claim will also appear marked in temporary Iron Blocks and Wool.
You can also view a list of all of your claims and their co-ordinates using the /claimslist command.
Claims Explosions
It's possible to enable explosions within a claim by standing in it and typing /claimexplosions.
Subdividing Claims
By Subdividing Claims, you are able to create subclaims within a regular "top-level" claim you made as demonstrated in the "Creating Claims" section. This is useful in particular for creating plots in a town, as you are able to trust people in a subclaim without them being trusted in the larger claim. Unlike regular claims, there's no size limitations on subclaims and so they can be as small as one block; subclaims do not take up claim blocks.
Apart from that, Subclaims act like regular claims. They are marked out by temporary Iron and Wool blocks. Do note though, that players trusted in the top level claim will retain their permissions inside any subclaims. Only the owner of the main top level claim can create subclaims within it.
Creating Subclaims
To create subdivisions, you will first need to be standing within the claim you wish to subdivide and type /subdivideclaims.
Removing Subclaims
To remove a subclaim, simply stand within one and type /unclaim or /abandonclaim to remove it. If you now wish to remove the main top level claim you can now simply type /AbandonTopLevelClaim to remove everything.
Restricting Subclaims (Advanced)
As mentioned before, players trusted in the top-level claim have the same permissions in any subclaims created within the claim. However, you can restrict subclaims to stop this and specify specific permissions for all players within subclaims. To do this, stand within the subclaim you wish to restrict and type /RestrictSubclaim. Note that only the claim owner can do this.
Tips
- Make sure to continue holding your shovel when creating, resizing or subdividing a claim. It may come as second nature to stop holding your shovel when moving from corner to corner, but this will reset the process. Your shovel must remain in your hands.
- If you have a large claim that you wish to extend in a certain direction, you can simply stand inside the claim and face the direction you wish to extend it by and type /extendclaim <# of blocks>. Of course, you need to make sure you have enough claim blocks to make the extension first.
- By standing outside a claim when trusting people, you can add them to all of your claims at once.
- If you need any help claiming, be sure to ask a moderator in-game who will be happy to assist you.
 Dogcraft Server
Features Rules · Ranks · Worlds · Commands · Server Web Maps · Dogcraft Dollars · Heads · Mini Blocks · Dogcraft.net · MailManagement Staff Team (List of Staff Members · Staff Liaisons) · Creative Team (Former: Build Team · Events Team)Guides Server History

